Recording
Shader Studio can capture your shader output as a screenshot, video, or animated GIF.
Opening the Recording Panel
Click the Record button in the toolbar, or open Menu → Export.
Screenshot
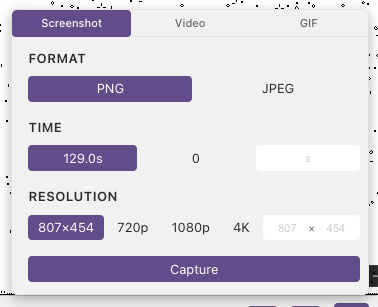
Capture a single frame as a PNG or JPEG.
| Option | Description |
|---|---|
| Format | PNG or JPEG |
| JPEG quality | 0–100 (JPEG only). Higher = better quality, larger file. |
| Time | Shader time at which to capture. Defaults to current time. |
| Resolution | 480p, 720p, 1080p, 4K, or custom pixel dimensions |
Click Capture to save. A live canvas preview updates as you change options.
Video
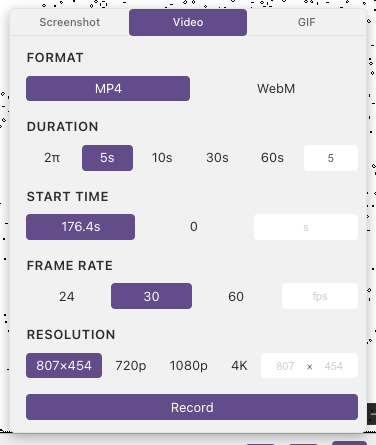
Record shader output as an MP4 (H.264) or WebM (VP8) file using the browser's WebCodecs API.
| Option | Description |
|---|---|
| Format | MP4 or WebM |
| Start time | Shader time to begin recording from |
| Duration | Presets: 2π (≈6.3s), 5s, 10s, 30s, 60s, or custom |
| FPS | 24, 30, 60, or custom |
| Resolution | 480p, 720p, 1080p, 4K, or custom |
Click Record to start. A progress bar shows rendering and finalization phases. Click Cancel to abort.
GIF
Record an animated GIF using the gifski encoder (WASM).
| Option | Description |
|---|---|
| Start time | Shader time to begin from |
| Duration | Presets or custom |
| FPS | 10, 15, 24, 30, or custom |
| Colors | Palette size: 32, 64, 128, 256 |
| Loop | Infinite or play once |
| Quality | 1–100 (higher = better quality, larger file) |
An estimated file size is shown before recording. Click Record to start.
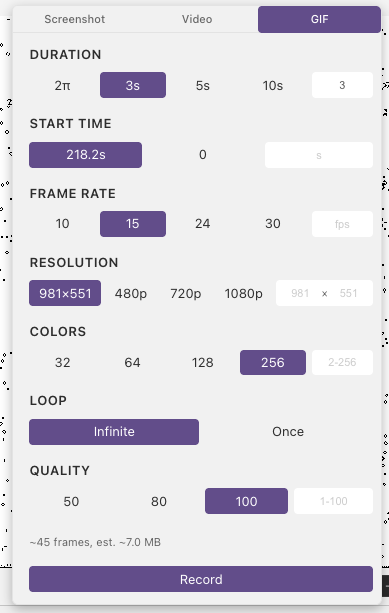
Tips: - For shaders you usually want Quality 100 to preserve fine detail, but try reducing it if the file is too large - Lower FPS and color counts also produce smaller GIF files
Next
Open in Browser — preview your shader in a web browser