Configure Passes and Inputs
The config panel is where you set up multi-pass pipelines and bind assets to shader inputs. Everything is stored in a .sha.json file that the visual editor writes for you.
Opening the Config Panel
Click the Config button in the toolbar.
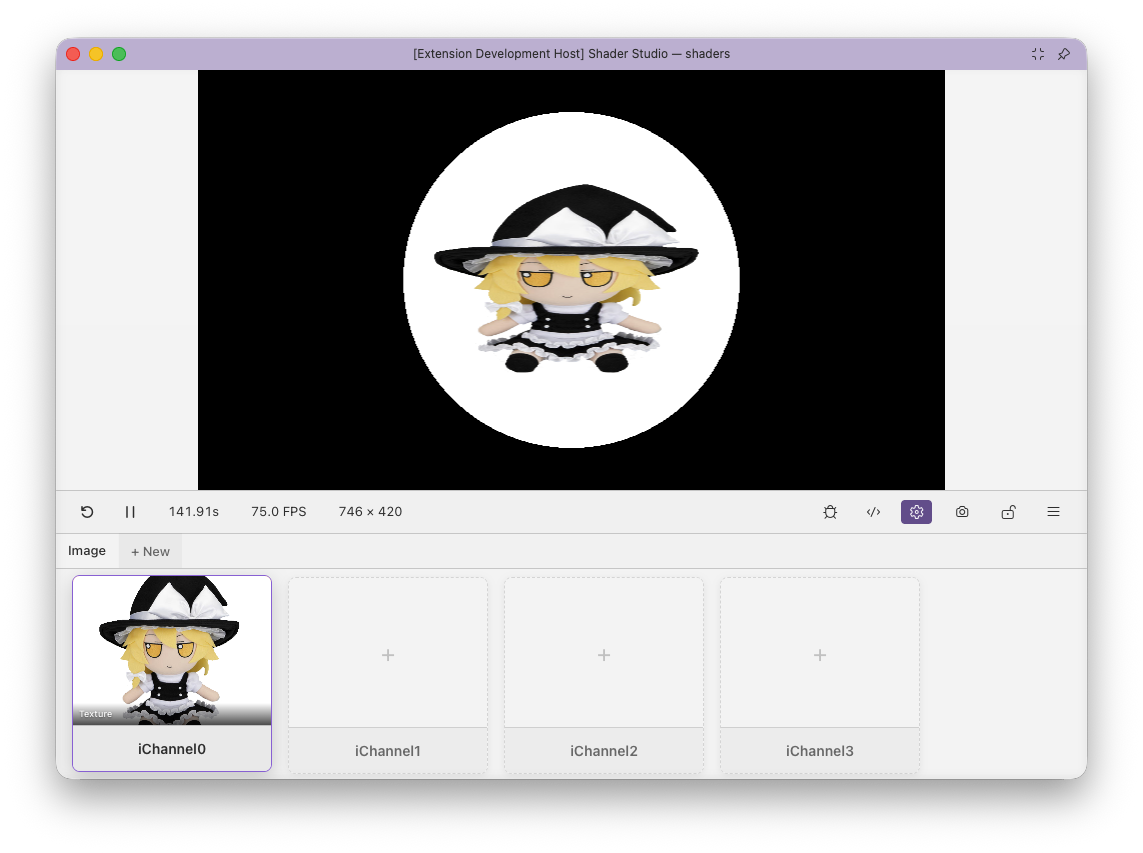
The Pass Tab Bar
The tab bar at the top shows every pass in your shader. Click + New to add a pass. Remove a pass with the × on its tab (Image cannot be removed).
Right-click a tab to open a context menu:
- Open — locks the shader and opens the pass's file in the editor
- Rename — inline rename for buffer passes (Image, Common, and Script cannot be renamed)

| Tab | Description |
|---|---|
| Image | Always present. The final rendered output. No file path — this is your mainImage shader. |
| Named buffer pass | An intermediate fragment render pass backed by a .glsl or .slang file. Names and pass counts are unrestricted. |
| Compute pass | A Slang/WebGPU compute pass declared with "type": "compute" and backed by a .slang file. |
| Common | Shared GLSL or Slang included at the top of every pass. Not a render pass — has no framebuffer. |
| Script | A TypeScript or JavaScript file that drives custom uniform values per frame. |
Note
Double-click a pass tab to open that pass's file — the shader locks automatically so the preview stays on your Image pass. You can also use the Lock button manually. See Locking.
The Image Pass
The Image tab has no file path — it always corresponds to your main shader file. You can set a default resolution here:
| Setting | Options | Description |
|---|---|---|
| Scale | 0.25×, 0.5×, 1×, 2×, 4× | Relative to the panel size |
| Aspect ratio | 16:9, 4:3, 1:1, Fill, Auto | Constrains the canvas shape. Auto uses your screen's aspect ratio. |
| Custom dimensions | e.g. 1920 × 1080 |
Base width and height in pixels |
The Image pass can also have input channels (iChannel0–iChannel15). See Channels for how to bind textures, video, audio, and more.
See Resolution for how these settings interact with the toolbar.
scaleandwidth/heightare composable. For example,width: 320,height: 180,scale: 2renders as640 × 360.
Buffer Passes
Each fragment buffer pass renders a .glsl or .slang file to an offscreen framebuffer that other passes can read as a texture. Buffer pass names are ordinary identifiers such as Flow, BloomHorizontal, or BufferA; there is no BufferA–BufferD name set or four-pass limit. You can also configure input channels (iChannel0–iChannel15) for each pass. See Channels for how to bind textures, video, audio, and more.
Path field — points to the shader file for this buffer. Three path forms are supported:
| Form | Example | Resolves relative to |
|---|---|---|
| Relative | passes/flow.slang |
The main shader file |
| Absolute | /Users/me/project/flow.glsl |
Filesystem root |
| Workspace-root | @/src/flow.glsl |
VS Code workspace root |
If the file doesn't exist yet, the editor shows a Create File button that generates it with a mainImage stub.
Resolution (optional) — by default a buffer inherits the Image pass resolution exactly. You can override this in two ways:
| Mode | Example | Description |
|---|---|---|
| Fixed | 512 × 512 |
Exact pixel dimensions, independent of the canvas |
| Scale | 0.5× |
Multiplier on the Image resolution — tracks canvas changes |
Per-Pass Geometry
Each buffer and Image pass can render with 2D or 3D geometry. Open the Geometry dropdown in the pass config to choose:
| Geometry | Description |
|---|---|
| Fullscreen | A full-screen quad (default). Standard 2D shader rendering. |
| Plane | A flat 3D plane. |
| Cube | A unit cube centred at the origin. |
| Sphere | A UV-mapped sphere. |
| Model | A custom GLB mesh. Shows a file picker to select a .glb file and, for multi-mesh models, a dropdown to pick which mesh to render. |
When a 3D geometry type is selected, a Vertex shader section appears below the dropdown. Set a path to a .vert.glsl or .vert.slang file, or click Create File to generate a stub. See Vertex Shaders for details on writing vertex shaders and the mainVertex API.
Compute Passes
For a Slang shader, declare a compute pass with "type": "compute"; its pass name can be any valid identifier. The + Compute action adds a pass entry; give it a .slang path containing one native [shader("compute")] entry point with [numthreads(...)]. Storage declarations and fields such as dispatch, dispatchCount, dispatchOnce, and outputLayers are currently edited in the raw .sha.json view.
See Compute Passes for the authoring convention, storage layout rules, and executable examples.
The Script Pass
The Script pass drives custom uniform values per frame from a TypeScript or JavaScript file. It has no framebuffer — it only produces uniform data.
Exporting Uniforms
Your script must export a uniforms(ctx) function that returns an object:
// shader.uniforms.ts
export function uniforms(ctx: {
  iTime: number;
  iFrame: number;
  iTimeDelta: number;
  iFrameRate: number;
  iResolution: [number, number, number];
  iMouse: [number, number, number, number];
  iDate: [number, number, number, number];
  iSampleRate: number;
  iChannelTime: [number, number, number, number];
}) {
  return {
    uSpeed:   ctx.iTime * 0.5,
    uColor:   [Math.sin(ctx.iTime), 0.5, 1.0] as [number, number, number],
    uEnabled: true,
  };
}
Type Inference
Types are inferred from the return value on the first call. The returned values are injected as GLSL uniforms automatically — no declaration needed in your shader.
| Return type | GLSL uniform |
|---|---|
number |
uniform float uSpeed; |
[n, n] |
uniform vec2 uOffset; |
[n, n, n] |
uniform vec3 uColor; |
[n, n, n, n] |
uniform vec4 uRect; |
boolean |
uniform bool uEnabled; |
Polling Rate
The Max Polling Rate slider (1–120 fps) controls how often the script runs. The config panel shows the actual vs. target polling rate for each uniform.
For slowly-changing values, 1–10 fps is usually enough. High rates consume more CPU.
Using Node.js APIs
Scripts run in Node.js and can require() any module. Modules resolve from the script file's own directory.
import * as fs from 'fs';

export function uniforms(ctx) {
  const data = JSON.parse(fs.readFileSync('./params.json', 'utf8'));
  return { uValue: data.value };
}
Because the script runs in Node.js, you can pull in values from anywhere — game controllers, serial ports, external hardware, WebSockets, OS sensors, or any npm package. For example, you could read a gamepad with a library like node-hid, stream data from a microcontroller over serial, or poll an external API for live data.
Warning
Do not name script uniforms the same as built-ins (iTime, iResolution, iChannel0, etc.). The script will fail to load with an error listing the collision.
The Common Pass
The Common pass points to a .glsl or .slang file whose contents are prepended to every other pass before compilation. Use it for shared utility functions, constants, and type definitions.
// shader.common.glsl — available in Image, BufferA, etc.
#define PI 3.14159265359

float hash(vec2 p) {
    return fract(sin(dot(p, vec2(127.1, 311.7))) * 43758.5453);
}

float noise(vec2 p) {
    vec2 i = floor(p);
    vec2 f = fract(p);
    float a = hash(i);
    float b = hash(i + vec2(1.0, 0.0));
    float c = hash(i + vec2(0.0, 1.0));
    float d = hash(i + vec2(1.0, 1.0));
    vec2 u = f * f * (3.0 - 2.0 * f);
    return mix(a, b, u.x) + (c - a) * u.y * (1.0 - u.x) + (d - b) * u.x * u.y;
}
// shader.common.slang — available in Image, BufferA, etc.
#define PI 3.14159265359

float hash(float2 p) {
    return fract(sin(dot(p, float2(127.1, 311.7))) * 43758.5453);
}

float noise(float2 p) {
    float2 i = floor(p);
    float2 f = fract(p);
    float a = hash(i);
    float b = hash(i + float2(1.0, 0.0));
    float c = hash(i + float2(0.0, 1.0));
    float d = hash(i + float2(1.0, 1.0));
    float2 u = f * f * (3.0 - 2.0 * f);
    return lerp(a, b, u.x) + (c - a) * u.y * (1.0 - u.x) + (d - b) * u.x * u.y;
}
You can then use hash, noise, or PI in any Image or named buffer pass.
Note
Common is not rendered — it has no framebuffer. It is purely a code injection, equivalent to a #include.
Other: Editing the Config File Directly
The config is stored as JSON in a .sha.json file with the same base name as the shader (myshader.glsl or myshader.slang → myshader.sha.json), in the same directory. You can edit it directly in VS Code, and the Config panel stays in sync with the file.
See Config File Format for the full schema reference.
Next
Channels — bind textures, video, audio, cubemaps, buffers, and keyboard input